Power of the Clone
When retouching images, basic cleanup is a normal part of the workflow. Backscatter, dust spots, and sensor dirt, are the kind of things most shooters want removed from their final images. And, for this sort of routine cleanup stuff, any number of Photoshop’s retouching tools can tackle the job.
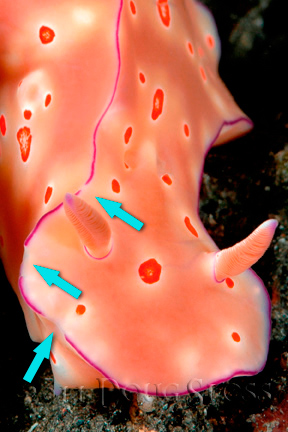
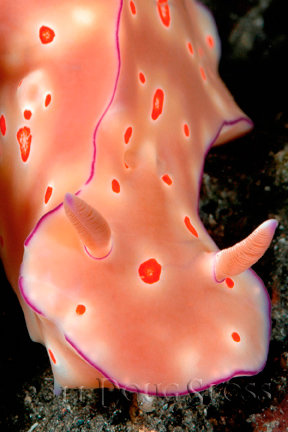
But there are times when a simple click with the Healing brush or Clone Stamp tool just isn’t enough to get the job done. For example, the retouch work needed to repair this damaged nudibranch is a prime example. Neither tool on its own can be effectively used repair the body regions that have been torn away by predators.
Luckily, Photoshop’s Clone Source panel offers some hidden features that make a retouch like this easier than ever, and learning how to correctly use the panel will give you greater control during the correction process to fix just about anything. Let’s examine how this challenging retouch was tackled to better understand ways to use the Clone Source panel for future edits.
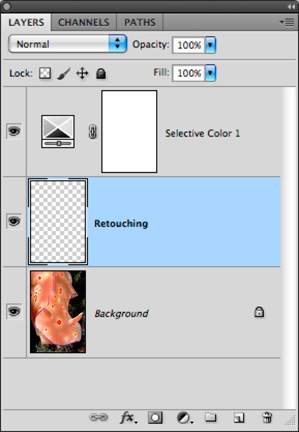
Figure 1. A separate retouching layer allows you to correct the image in a non-destructive manner. Holding down the Option key (PC:Alt key) while clicking the New layer icon in the layers panel allows you to name the layer at the same time to stay better organized.
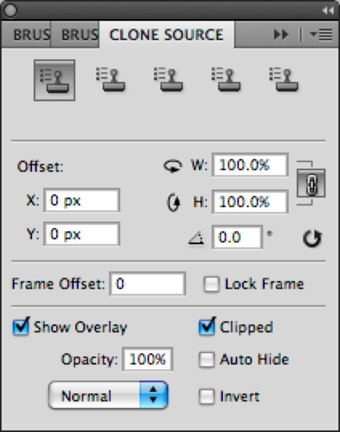
Retouching work is best done on a separate layer so you can protect the original pixels in a file and work non-destructively (Figure 1). Once you’ve created your retouch layer select the Clone Stamp tool, choose a soft-edge brush and change the Sample setting in the Options bar to All Layers. If you are working on an image that already contains adjustment layers, activate the “Ignore Adjustment Layers” icon next to the Sample pop-up menu too (Figure 1.2). For this image, cloning like this allows my repair work to be independent of the Selective colour adjustment so it will always look natural even if the adjustment layer settings are changed in the future.
Figure 1.2 To sample all the layers in your document except adjustment layers, set the Sample pop-up menu to All Layers and click the Ignore Adjustment Layers icon to the right.
Finally, open the Clone Source panel before starting your restoration work. If it is not already visible go to Window > Clone Source to bring it up. The Clone Stamp tool works just like it always has, but with the Clone Source panel open, it is now more powerful. Let me explain.
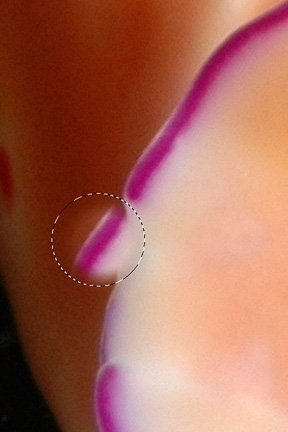
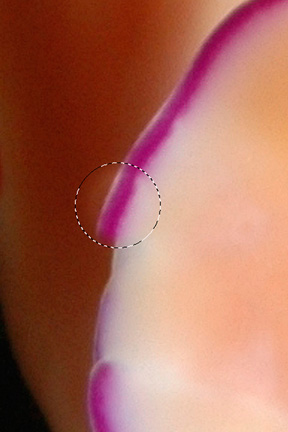
The first region repaired in this photo was the small tear on the purple line just above the nudibranch’s rhinophore. To fix the area, a portion of purple line was sampled just above the break then cloned into the region where no line was present. To do that I hovered over the source region, then clicked the Option key (PC:Alt key) to sample the area and repositioned the tool over the damaged region and clicked the mouse to make the repair.
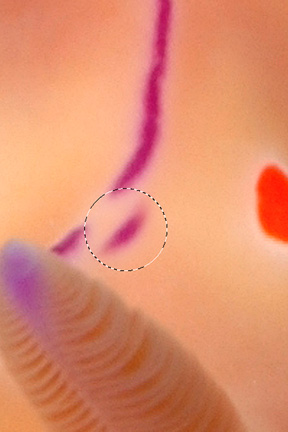
Figure 2. With the Overlay feature on, a ghosted preview allows you to precise place the sampled area onto the region to correct without having to eyeball your correction and possibly start over. This sampled area is then just moved into position and laid down by clicking with the mouse.
Here’s the thing. In the past without this overlay feature, you would have to eyeball where to lay down your corrections which sometimes made the edits look sloppy and multiple tries to correct a region was just part of the process. With the “Show Overlay’ feature turned on you have a ghosted preview of the image area to be repaired which allows you to interactively see the content that will replace the damaged area effectively giving you a preview of the repair before you even begin to clone.
This not only allows you to precisely repair a tricky area like this, but it allows you to work smarter and faster. With the Overlay feature turned on, you can actually see what Photoshop is cloning from and how it will look before laying down the correction. How cool is that? (Figure 2)
Correcting the next two regions was a little more tricky. On the left of the image, much of the creature’s body was torn away by predators and subsequently disfigured during the healing process, but working with both the clone tool and source panel open on a repair like this makes the job much easier.
The challenge here was making the repair bend with the contours of the creature’s body. If I just sampled a region and went in to make the repair, the edits will have continued out straight when they should be curving inward to eventually connect with the bottom region of the nudibranch that still looks good. (Figure 3)
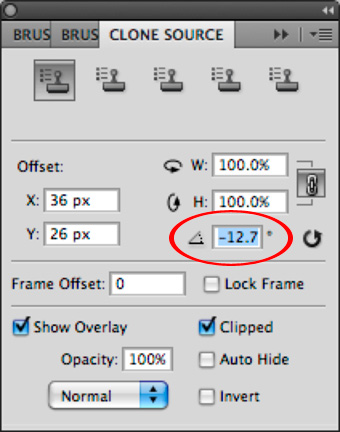
Figure 3.1 During the repair process the cloned region can be rotated in either direction to better fit the situation. Change the angle of the source by entering a number in the angle field of the Clone Source panel
By rotating the angle of the source inside the panel and using the overlay preview I was able to precisely align my edits so the added pixels make a very credible edit.
Throughout the process, I am resampling the source as needed, trying out different angles and seeing what will work. If you make a mistake, you can just go back a step or two using the History panel, and try again.
The same technique was used on the bottom tear as well. The repair work even clones the texture and shading of the surrounding regions helping to make the edits look flawless.
(Figure 3.2)
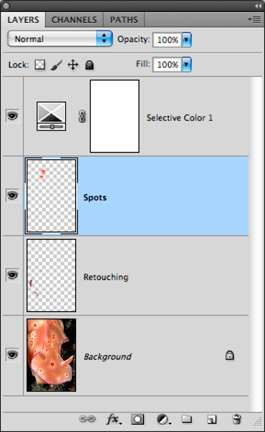
Figure 4. While all the repair work was applied to the "Retouching" layer, another layer was created to add the spots. Keeping these layers separate increases workflow flexibility and allows me to remove one repair independent of the other should the need arise
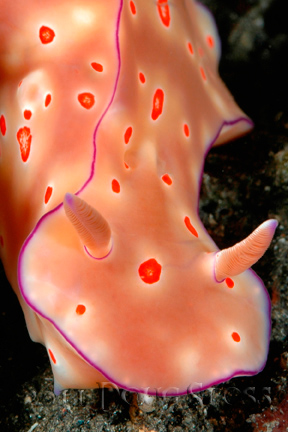
Another trick you can employ while retouching is altering the orientation and scaling of sampled pixels. For example, the upper left of the nudibranch had some scarring I repaired earlier but the work left the region void of colourful spots that probably existed before the damage. To make that repaired region look even more credible, I chose to add two additional spots to the area. (Figure 4)
Comparing the two images all the repairs look believable and blend in seamlessly, including the additional spots which help hide any evidence of an earlier destroyed region.
Armed with the right tool and just a little bit of tool knowledge, you can do some impressive stuff.



You must log in to post a comment.