Quickly Remove a Color Cast
by Doug Sloss
Inadequate lighting situations or a poor white balance setting can sometimes cause an image to carry a color cast. Underwater, it’s even more challenging, since photographers have additional variables to contend with, like strobe light, which must travel through the water column to illuminate a subject, and the color absorbing effects water at depth can have on a wide angle scenic when trying to compose the shot. All these factors can lead to an image that’s less than perfect, dull looking and cause a photo to carry an unwanted tint. To improve the overall color in a photo, sometimes removing the color cast is all that’s needed to bring it back to life.
Here’s two quick and easy ways to snap your colors in line. Both techniques use a visual approach and are easy to apply so anyone can do it.
Let’s start with the Match Color command. It can adjust a photo’s brightness, color saturation, and color balance and is sometimes used to eliminate a color cast fast. Here’s how it works.
Apply the command in a non-destructive fashion by working on a duplicate of your background layer. To name your duplicate layer at the same time, try this keyboard shortcut. Using a Mac? Press Option+Command+J, and if you’re on a PC, Alt+Control+J will do the job. Naming layers helps you stay better organized. (Fig. 1)
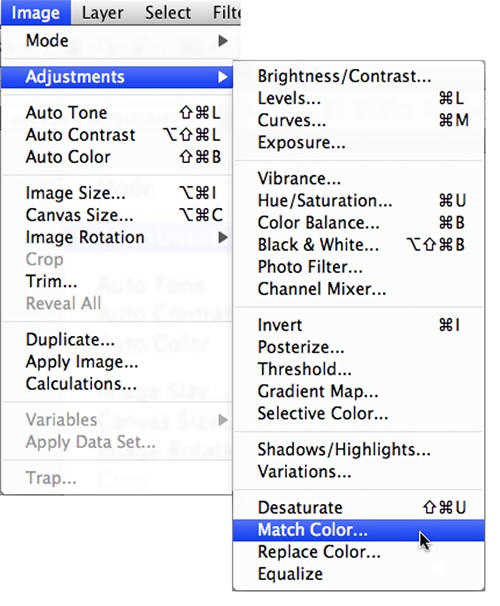
With the layer still active, go to Image > Adjustments > Match color. (Fig. 1.2)

In the New Layer dialog, give your duplicate background layer a relevant name to help stay organized. Here, the duplicate was named Match Color after the correction the layer performs. Match Color must be applied on a duplicate of your background image to work non-destructively on an image. (Fig. 1)
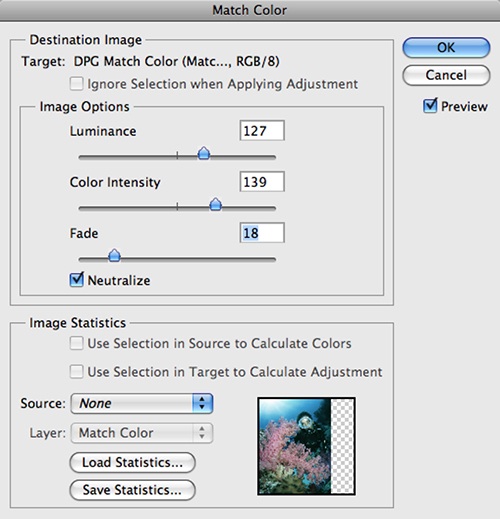
Make sure Source is set to None, and check the Neutralize checkbox to remove the color cast. Here the overall affect was toned down using the Fade slider. The result was further enhanced using the top two sliders, brightening the image some and increasing the overall saturation of the photo too. Adjust all three sliders and stop when the image looks visibly good. Fade the opacity of the duplicate layer to fine tune a Match Color correction if it still is too intense. (Fig. 2)
In the dialogue, under Image Statistics make sure the Source Menu is set to None. This tells Photoshop that the source and target files are the same image. To remove the color cast, check the Neutralize option, and the cast is removed.
If the correction is a little strong, slide the Fade control right to tone down the adjustment. Here, the correction added a touch too much magenta to compensate for the blue-green color cast. By adjusting the fade slider I was able to find a better result.
You can also adjust the brightness and saturation values in the image by working the Luminance and Color intensity sliders inside the Image Options field. Work all three sliders, fine tuning them in combination to visually arrive at a setting that works for you. (Fig. 2)
Here, the combination helps improve the model’s skin tones and intensifies the colors of the soft coral in front of her. Toggle the Preview box to check your progress and compare the before and after image. On many photos, you’ll have nice correction, that was slider based and FAST, making the challenge of removing a color cast pretty easy and the results speak for themselves. When you are happy with your adjustments, press OK to commit the change. You can even try fading the duplicate layer’s opacity for any last minute final tuning as well.
One other effective way to quickly remove a color cast is through use of the Color Balance command. Color Balance allows you to change the overall mixtures of colors in an image, and can be used for generalized color corrections, including eliminating a color cast.
Apply the command as an adjustment layer. This gives you the added flexibility to revisit the command for further refinement if needed, and reduces the file size compared to the Match Color approach where work must be done on a duplicate layer to prevent destroying a file’s original pixels.
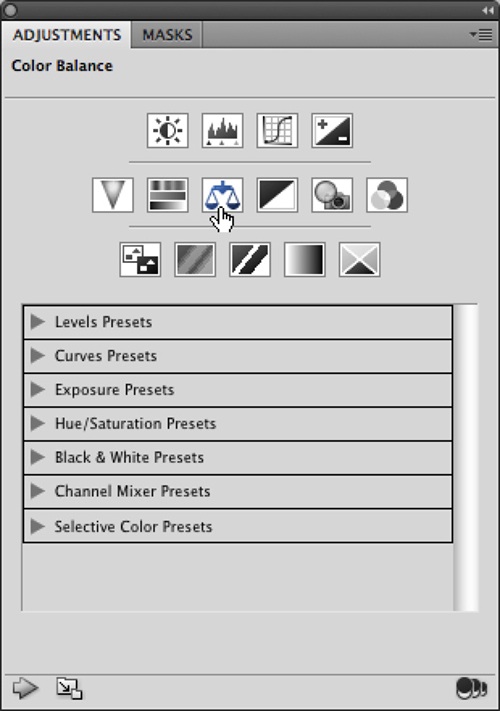
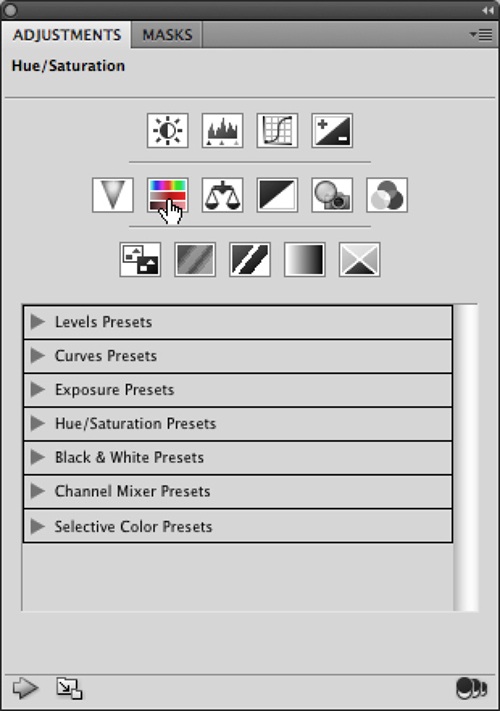
Created a Color Balance adjustment layer from Photoshop CS4’s new Adjustments panel by pressing the scale icon. (Fig. 3.1)
To do that, go to the Adjustments panel and click on the Color Balance icon (Fig. 3.1).
If you are not using Photoshop CS4 go to Layer>New Adjustment Layer> Color Balance to bring up the command.
In the command panel are three sliders that work on the principle of increasing or decreasing opposite colors to color balance an image. (Fig. 3.2)
You can also constrain an adjustment to just the shadow, midtone or highlight regions in an image if precise control is needed in a certain tonal range. However, leaving the Tone set to the default Midtones setting, has a more global effect on eliminating the color cast and normally does the trick. Be sure “Preserve Luminosity” is checked to maintain tonal balance and brightness throughout the image.
The sliders are easy to work. In the example, to get rid of the blue color cast, the bottom slider was moved towards yellow. If you are unsure what colors are effected just drag the sliders to extreme amounts and that will help you better judge how to correct the photo. Toggling the visibility of the layer frequently also helps perform the edit.
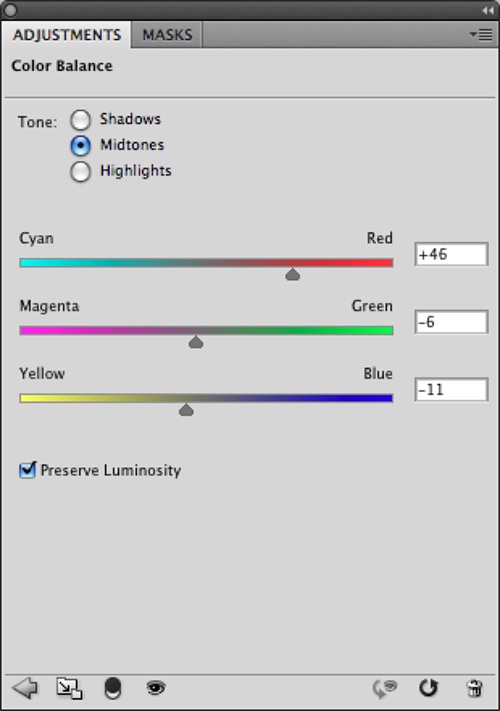
In the command panel, work the Midtones first, moving the sliders in opposite color directions of the noticeable color cast. For example, if there is a blue color cast, move the bottom slider more towards yellow to balance out the colors. Work all three sliders in unison, to achieve the look you are after. Preserve the luminosity so corrections have little impact on the brightness values in the scene. (Fig. 3.2)
After the adjustment, a slight greenish tint remains in this image. To correct that, the middle slider was moved towards magenta to counter balance the green tint. When color balancing the image feel free to fine tune the sliders until the image looks visually correct.
Finally, pulling the top slider right, adds the remaining touch of magic, injecting rich, red tones back into the image making all the colors come to life. The color cast in the soft coral, skin tones of the model, and water column is gone, the image is balanced, and again, the adjustment was completely visual and FAST. No in depth knowledge of Photoshop’s tools and commands was needed to improve the image. Three sliders and the shot looks awesome!
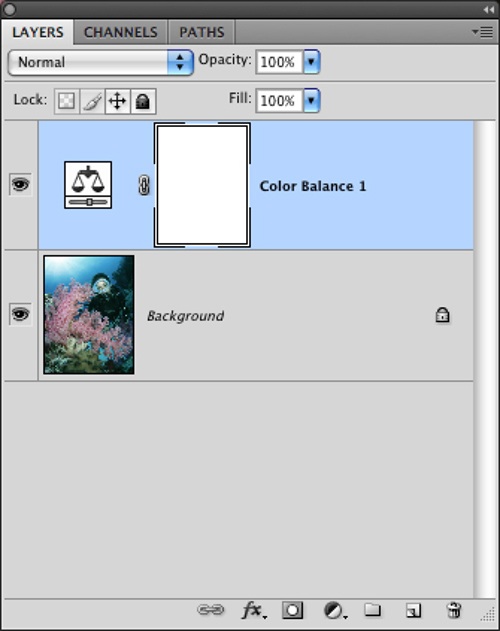
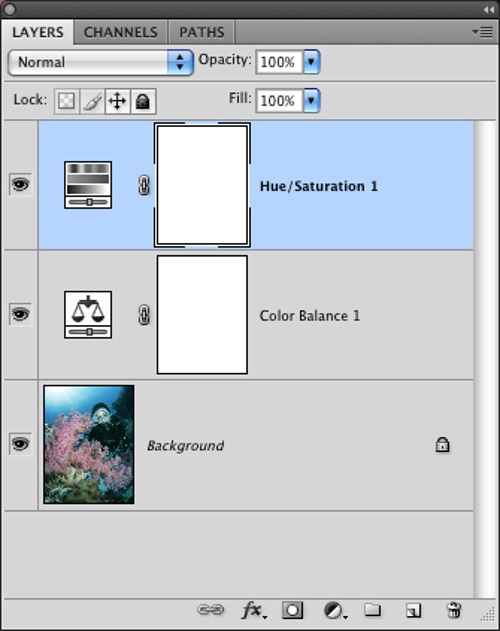
An adjustment layer, allows you to revisit the command and use the layer mask to limit corrections to certain areas for greater flexibility; use it if needed (Fig. 3.3).
It’s also on an adjustment layer that protects my original pixels, keep my file size low and can be revisited if needed (Fig. 3.3); with all that, color balance is the winner.
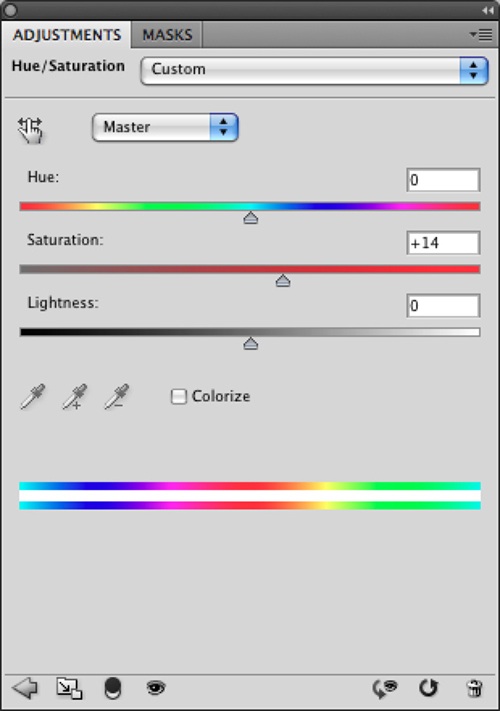
A slight boost in overall saturation using the Hue/Saturation command finished off the image. (Fig. 4 – Fig. 4.1)
Whichever method you prefer, both quickly give you results you’ll be happy with!



You must log in to post a comment.